
Originally created by Rosalina Young
The birds are chirping, the flowers are budding, the world of nature is waking up, and so can your makeup look! Spring is in the air so we are here to help you spritz up your Spring palette with a hint of colour and a whole lot of glamour :)
This tutorial is inspired by the vibrant colours of nature. Let’s begin :)
Step 1:

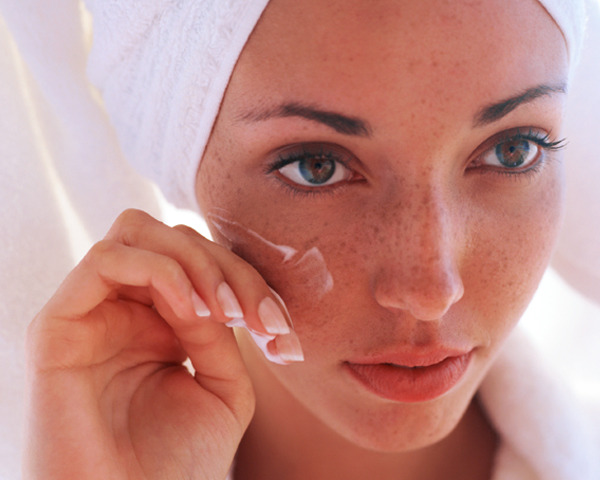
To begin, we will need to moisturise and prime our face so that our look lasts all day.
Once the primer has dried, apply concealer to any problem areas (and green colour corrector if you wish) to begin our base. Make sure to cover any dark circles, red-pigmented areas and blemishes to get started.
Step 2:
Apply a liquid foundation using either a stipple brush or foundation brush beginning with the t-zone area and then making your way out to the edges of your face, to avoid that ‘line.’ Once the foundation is dry and ready to go, use a loose powder brush or a kabuki brush to set your foundation with a loose powder, this will help extend the lasting power of your fantastic Spring look.
Step 3:
Perfect! Once you have set your foundation we will begin on the eyes. This is a tutorial with quite a lot of make-up on the eye area so it is absolutely essential to prime your eyelids with eyelid primer so that it lasts as long as possible.

If you feel more comfortable with filling in your eyebrows, make sure to do so in this step. For a bit of a hand with eyebrows, make sure to check out our blog on ‘Eyebrows.’
Step 4:

Now we begin with shading the eyes.
Firstly, use a short shader brush to apply a yellow coloured eyeshadow to the inner section of your eyelid.
Then apply a light green shadow onto the inner-mid section of the eyelid before applying a green (almost aqua) colour to the mid-outer section of the eyelid.
Next apply a teal colour to the outer section of the eye and then use a fluffy blending brush and blend away. You want to make sure that you dab on the colour using circular motions if anything – do not drag!
*note: when applying each colour, make sure your brush is clean to give more definition to the colour
Step 5:
To add a little extra flair, apply a white (almost shimmery) colour to the inner corners of your eyes, as well as a very light dusting of an orangey-pinkish colour to the outside rim of the yellow section and the same yellow to the edges of the teal section.
*note: If you want to go for the full-effect, follow the same colour blending technique to edge of the bottom lid and blend.
Step 6:
Grab your liquid eyeliner in black and apply, building up the thickness as you go. Begin in the mid-section of the eyelid and draw out along the edge, and the match where you began the line from the inner tear duct. This will give you a more steady line, as it is easier to manage a line by connecting it together rather than trying to keep it steady the whole way. For tips on how to apply the perfect liquid eyeliner, see our blog on ‘Liquid Eyeliner.’
*note: If you feel more confident applying the liquid eyeliner before the eyeshadow, by all means go for it, but make sure to go over it once you have finished the eyeshadow to give it as much definition as possible.
Step 7:
Curl your lashes and apply a generous coating of mascara onto your eyelashes, gradually building up the thickness to avoid that ‘clumpy’ look. Make sure to look down and wait for it to dry so that your wet eyelashes don’t ruin the perfectly sculpted artwork of your eyelids!

*note: when applying mascara, hold your wand straight as close to your eye as possible and then close your eyes onto the bristles, so that the eyelashes drag onto the brush. This gives you a coverage from the roots of the lashes
Step 8:
Now that we’ve completed your beautiful vibrant eyes, lets move on to your cheeks. Dust on a bronzing powder (note: different to bronzer) to your cheekbones, temples and the end of your nose for a radiant glow.
*note: we love the Nutrimetics Illuminating Face Powder
Step 9:
To give your face a bit of depth and definition, apply a dusting of blush to the apples of your cheeks and blend away before applying a bronzer along your cheekbones, moving from your eye towards your mouth and blend with a bronzing brush. If you wish to add a bit more contouring to your face, be sure to check out our blog on contouring in ‘Basics 2.’
Step 10:
And for the piece di resistance, finish with a bright pink lipstick with cool undertones. Be sure to choose a colour that isn’t overpowering and one that resembles the beautiful colours of Spring flowers. See photo of Rosalina Young‘s completed look at top of page for reference.

And there you have it! A masterpiece you can wear out anywhere, especially enjoying that precious time with nature we so often take for granted.
How did you enjoy yourself Michaelangelo? Was our tutorial easy to follow? What are your favourite spring colours?

Remember to follow us on Twitter! :)
Spring looks that we would love to try:

Rosalina Young: who's look (at beginning) this tutorial was based on (www.facebook.com/rosalinayoungmakeupartist)


Natalie (www.beautyybox.com)

Some inspiration from our fellow gurus:
Isabel Zipevski
pictures by:
https://www.facebook.com/rosalinayoungmakeupartist?ref=profile
http://dy6g3i6a1660s.cloudfront.net/8hLpjUIh6NIzjhxU-QyYQQJYAeA/orig.jpg
http://i.beautylish.co/3xVXg24gScb5Hfl4S9qwRwHgAWg/lb-35/eyebrow-tutorial-how-i-fill-in-and-shape-my-brows-highly-requested.jpg
http://www.realbeauty.com/cm/realbeauty/images/k4/rb-applying-mascara-1-0809-mdn.jpg
https://blogger.googleusercontent.com/img/b/R29vZ2xl/AVvXsEiOLQXUOdVje-xeU1VVqtQJLXQTMBh_jrRjojxfC6JHKYDbW6rL_y8b9BWOGd8gZoABNen8Ry4keO5aLjBnKpZwitYh52byGhcuGVwKOLzh08WYZv2Wetywq3HAVgu6G8mQYBTDracSvB8/s1600/myriam+fares+flower.jpg
http://www.naturewallz.com/user-content/uploads/wall/o/57/yellow_tulips_field_wallpaper.jpg
No comments:
Post a Comment