
Work and school are two environments in which make-up can be a tricky venture. While you don’t want to look
like you’re going to hit the runway, you also want to be presentable and cover up those 3am blemishes and dark circles from staying up all night working on an assignment.
The main aim of this article is to demonstrate the importance of what’s inside your head, not what’s on it. In this tutorial we are going to show you how to look presentable and appropriate in the workplace and in school because we believe, the most important thing is that you are able to shine in whatever you do :)
Tips:
- Try to keep a loose powder, bronzer, a few q-tips and lip balm/gloss/stick in your bag for touch-ups throughout the day. If you are working an 8hr shift or at school/uni for possibly longer, your make-up will most likely wear off throughout the day
- Make sure to steer clear of overpowering perfumes, you don’t want to intoxicate people and smelling clean with a hint of fragrance is always a suitable option (think of keeping a ‘sprtizer’ in your bag also for a spray when the day nears its end). Fragrance oils are also a nice option.
- Clean nails are also an important point to note, natural is beautiful! Just remember to keep a nail kit including; a nail brush, nail file, nail clippers and wet ones (refresher wipes - preferably non-alcohol as it's better for your skin) handy in your bag for any incidentals!
Step 1:

Firstly prime your face with a primer or a moisturiser to fill in any wrinkles and pores and to give your skin that extra bit of nourishment that it will never turn down. Once it has dried, correct those dark circles and blemishes with a bit of concealer, using your finger to dab lightly. As mentioned previously, you do have the option in this step to use a green colour corrector for areaswith a reddish pigment.
*note: Make sure to be sparing with this, the less concealer you have on, the less foundation you will need to even it out with
Step 2:
Gradually apply a tinted moisturiser and or a BB cream to your face, beginning in the t-zone area and making your way out the edges of your face, to both even your base and to avoid that ‘line.’ Be sure to use a stipple brush (see our ‘Basics 3’ article on brush maintenance) or your finger, though a brush will work better at evening out the coverage.
*note: If you opt with the BB cream, we suggest you skip the priming step, as it has an inbuilt one within it!

Step 3:
Set your foundation by applying a translucent powder with a loose powder brush, this will avoid that ‘shiny’ look and keep your makeup the same way it looked when you leave the house, for longer.
*note: avoid that ‘grey eyebrow’ look by dipping a cotton tip (or q-tip) into water and wiping the excess foundation off them
Step 4:

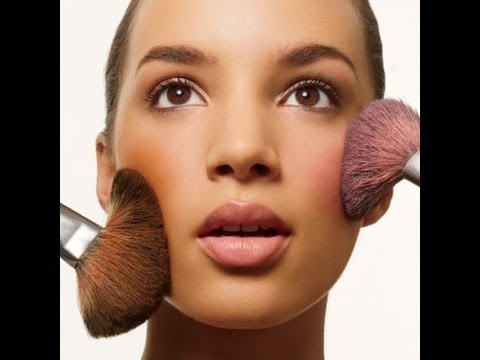
Dab on a hint of blush before applying a gentle application of bronzer to give your face a bit of definition and colour.
Apply in strokes along the line of your cheekbones, moving from your ear toward your mouth and gradually build it up.
*note: we use the term gradually a lot in this tutorial as you want to keep a close monitor on just how much makeup you’re applying so as to make sure your look remains appropriate
Step 5:
Apply an eye shadow that is 2-3 shades darker than your normal skin tone in the crease of your eyelid using a shader brush and blend naturally as possible. Then apply an eye shadow that is 2-3 shades lighter than your natural skin tone to your eye brow bone and to the inner corners of your eyes using a smaller shader brush. This will brighten up your eyes!
Step 6:
To add definition to your eyes apply a minimal amount of eyeliner using an eyeliner pencil, before using a white eyeliner on the bottom lid to make your eyes appear larger and brighter, making sure to apply it to the water line (closer to the eye than the lash line). See right


*note: Make sure to only apply the eyeliner and the mascara (should you choose) to the top lid as it looks more natural anddoesn’t lead to that ‘smudged’ effect.
Also, for longer lasting eyeliner, use a liquid liner, but try to avoid the ‘cat-eye’ look (which we all can get carried away with when we apply liquid liner)
Also, for longer lasting eyeliner, use a liquid liner, but try to avoid the ‘cat-eye’ look (which we all can get carried away with when we apply liquid liner)
Step 7:
 Next curl your lashes with an eyelash curler before either applying a light coating of mascara, applying a natural coating of clear mascara (packaging looks just like mascara) or simply leaving them beautiful and natural!
 Finish off with a slick of lip balm, gloss or basic lipstick and you’re all done!
*note: when choosing a lipstick, make sure to select one that is close to your natural lip colour as well as one that is moisturising, so that it nourishes your lips throughout the day and requires less application.
Finito! And there you have it lovelies, 7 Simple steps to get you feeling fresh, glam and out the door in no time!
Have any tips and suggestions for a suitable work & school make-up look? What are your favourite ways to make yourself presentable? Let us know in the comments below!
Remember to follow us on Twitter :)
This tutorial was inspired by iwanted2c1video’s ‘Everyday Makeup’ look:
Some inspiration from our fellow gurus:
Isabel Zipevski
pictures by:
https://blogger.googleusercontent.com/img/b/R29vZ2xl/AVvXsEiTK643TgTe7CtiWut2IF5oel-uLQDTzNzvx_gwDpUO41mpvFlbxekos9yurhBGgNuRwWoIAfXR5nItL-H99b2STnnpVORZOA4K0O53RCVROI02tKa2PVse0Rlk_gJNBT8ciBkinDP8hHxq/s1600/nina-dobrev.jpg
http://lafemmeindia.inditalent.com/wp-content/uploads/2013/06/Applying-Eye-Cream-For-Dark-Circles2.jpg
http://i1.ytimg.com/vi/-9lyg9DNfsY/hqdefault.jpg
http://www.myfashioncents.com/files/2012/11/blush-bronzer-review.jpg
http://thebeautyspread.files.wordpress.com/2012/09/white.jpg
http://www.dailymakeover.com/wp-content/uploads/2010/06/StyleCaster_Lashes21.jpg
No comments:
Post a Comment