Thursday, October 31, 2013
Wednesday, October 9, 2013
How to Apply False Lashes
False lashes. We all have a hate-love relationship with these bad boys, until we master the technique of how to apply them without getting them damaged that is. In this blog we will teach you beauty lovers how to apply false lashes with ease; just follow our simple steps!
STEP ONE: EYELASH CURLER
Using a eyelash curler curl your lashes by –
1. Press the curler on the roots of your lashes and hold for 10-20 seconds (depending on the thickness of your lashes). The eyelash curler should be held horizontally.
2. Slightly open the curler and rotate it to a vertical position. Press again holding it for 10-20 seconds.
STEP TWO: MASCARA
Apply any mascara to your lashes for an extra BOOM effect. Applying mascara to your lashes will also allow your lashes to blend more with your false lashes once applied. Typically most girls use their least favourite mascara for this step, as your lashes will mostly be covered up.
STEP THREE: TRIM
Trim your false lashes for a perfect fit by –
1. Pick your false lash up and measure it next to your eye, making sure you line the lash up starting from your inner-lash area.
2. Once the lash is lined up to your eye you will be able to notice how much (if any) needs to be trimmed.
3. Using scissors trim off the amount of lashes from the OUTTER side of the lash. If unsure about the amount needed to be trimmed then only trim a bit, measure again and trim once more if need be.
STEP FOUR: GLUE
Using the lash glue –
1. Line the lash from end to end with the glue. Make sure you have used enough glue other wise the lash won't stick properly, don’t over use the glue either. A thin line of glue covering the entire section should be enough.
2. Wait for the glue to get tacky. You can either wait it out or speed up this process by blowing on the glued area, using a hair dryer for a few seconds or waving the lash in the air as if it is a paper fan.
Once the glue is tacky apply the lash to your eye by –
1. Pick the lash up from the middle using either tweezers or your fingers and line the lash up to your eye area just above your real eyelashes.
2. Press the middle area of the lash onto your lash line. From there press the rest of the lash onto your lash line.
3. Gently adjust your lash to be in the correct spot. Close your eye and press the lash for 20-40 seconds
STEP SIX: LINER (optional)
Apply a liquid eyeliner to your top lash line, this will give your false lashes more of a natural effect.
Some inspirational looks from our fellow gurus:
Range of lashes. Different effect.
Play with Liquid eyeliner
(check out our post on liquid eyeliner)
Have a go with colour and contouring
(check out our blog on Contouring)
Liked this blog? Remember to subscribe and follow us on Twitter!
Here are a few video tutorials for all those visual learners
Victoria Jakubowski
pictures by:
pictures by:
http://www.fakeeyelashes.co.uk/
http://pakifashion.com/arabic-eye-makeup-pictures/
http://uniquebeautytips.blogspot.com.au/2011/04/herbal-remedies.html
http://weheartit.com/entry/46316906
http://data2.whicdn.com/images/46316906/tumblr_m0qg460Yh01rqr4gao1_500_large.png
http://juliemissjuicy.com/wp-content/uploads/2011/04/longer-eyelashes.gif
https://www.facebook.com/frootibeauty
http://www.muaserved.com/gallery/Focus-on-Makeup/4748127
Tips for a flawless finish

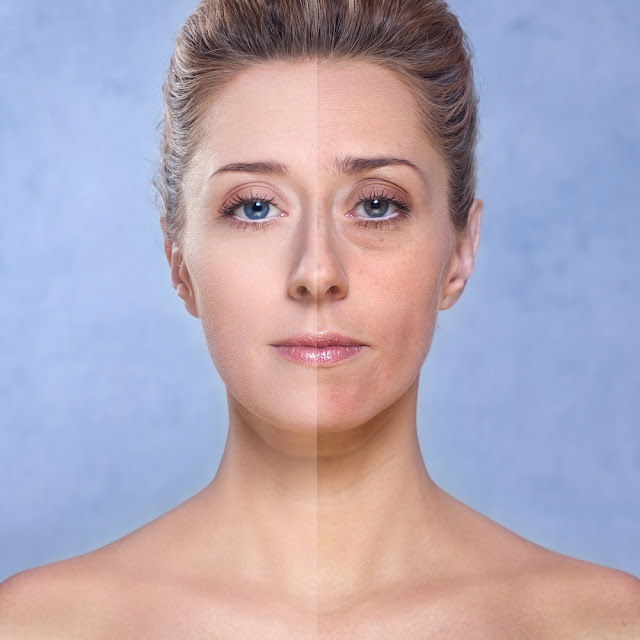
We all want flawless skin but sometimes we get a few pesky acne that pop up which makes us immediately want to put a paper bag over our heads. Or maybe you have the largest under eye shadow this world has EVER seen or even rosacea.
Makeup is a tool that you can use to hide imperfections and flaws. It can give you a huge confidence boost so you can stop hiding under that paper bag and brave the world outside.
Let us know what you think by commenting below!
__________________
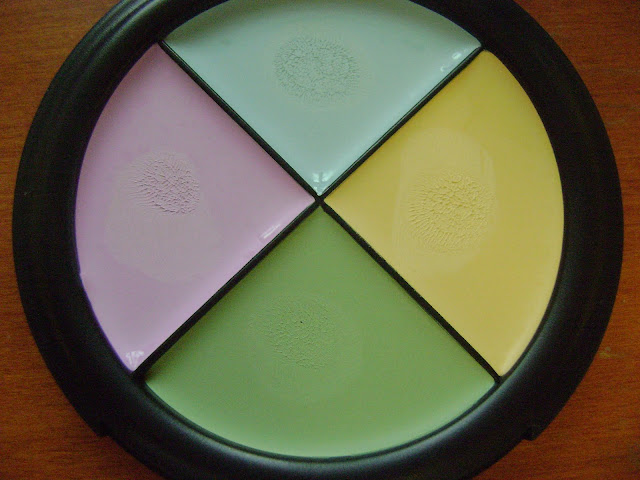
Colour Corrector Concealer Quad
This quad is perfect for unsightly imperfections. It helps by eliminating the colours it contrasts with.

Which colours go with which imperfection?
Acne/Rosacea:
Use the green concealer and dab onto redness to eliminate the red. Look below, it is possible even for the worst of skins.

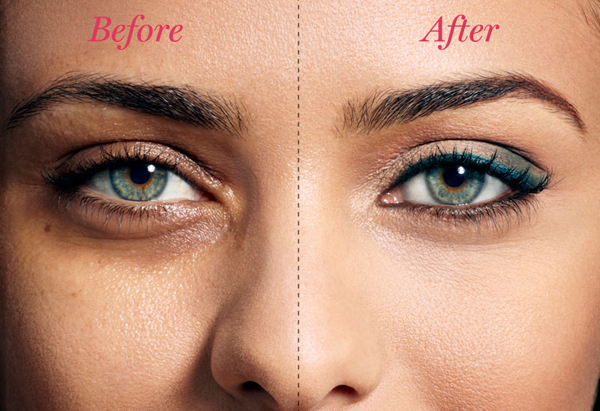
Dark under eye area:
Choose the yellow coloured concealer from the quad as this colour cancels out dark purple and blue tones.
 |
dark circles makeover
|
Orange spots or a self tan gone wrong:
Apply the blue concealer as it cancels out and orange. A good save from being an ompaloompa!

Dull skin:
Apply the pink concealer to help dull skin look radiant, it is also used to help you look more youthful.

Of course, these colours should be applied under liquid foundation to hide the colour and create a flawless, even toned base.
View our other blogs to create different looks!
Remember to subscribe and comment to our blog as well as follow us on Twitter!
Tips from our fellow gurus:
By Olivia Jakubowski
Photos:
How to choose the perfect foundation for your skin tone?
Tone! Tone! Tone! And getting it right! The one typical rule which most girls go about when buying a foundation is choosing one that's a shade lighter than their skin tone. What a possible one third of these lovely ladies are forgetting or unaware of is matching the right foundation with the correct undertone.
We're here to give you guys a hand with selecting the right foundation for you, let's get started! :)
1. Shade
The one big rule that has been around for years in choosing the right foundation colour for your skin tone is to pick the foundation one shade lighter than you. Wearing a foundation darker than your skin tone will make you look caked and if you are out and about for some time or on some hot day you may look blotchy, as some areas my have worn away after some time. This would be avoidable by wearing a lighter foundation and it has a similar effect as concealer.
2. Tone
One rule many figure out after a while either on their own or via word of mouth or research is that when picking a foundation you have a selection of tones and colour to choose from! By this we mean in a row such as the picture above with the foundations of the same kind are placed in order from lightest to darkest. What most people don’t realise is that these foundations also include pink or yellow undertones; also known as warm and cool. If you choose a foundation with the opposite undertone even if it is your correct shade the foundation is not going to look great, whereas choosing a foundation suiting the correct undertone will give you a natural finish.
Some helpful pictures which explain visually:
Warm = Yellow undertones - Cool = Pink undertones
The colour of your veins through your skin of your wrist area can act as a code in telling what undertone group you belong to. Blue veins typically fall into the cool (pink) category, whereas green veins fall into the warm (yellow) undertone category.
Some other tips from our fellow makeup gurus. Enjoy!
Victoria Jakubowski
pictures by:
Subscribe to:
Comments (Atom)


